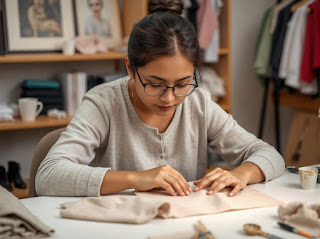
How to Stitch Clothing: A Beginner's Guide to Creating and Repairing Garments
Introduction
In today's world of fast fashion, learning how to stitch clothes is not only a very useful skill but also an empowering means to express creativity, save money, and reduce waste. Be it a beginner who wants to mend his favorite shirt or an aspiring designer who intends to create unique pieces, stitching can do it all.
Ready to elevate your wardrobe? Visit our website today and explore our latest collection.
This comprehensive guide will walk you through the basics of stitching clothes, the essential tools you'll need, step-by-step instructions, and actionable tips that will make your journey into sewing enjoyable and productive.
Why Learn to Stitch Clothing?
Stitching is an invaluable skill for a number of reasons:
Cost-Effective: Repairing or tailoring clothes at home saves money on professional services.
Sustainability: Extend the life of your garments and contribute to reducing textile waste.
Creative Freedom: Customize or create clothing to reflect your personal style. Practical Utility: Quick fixes, such as sewing on a button or hemming pants, become a breeze. Whether you're doing a simple repair or embarking on a creative project, stitching equips you with the tools to take control of your wardrobe.
Essential Tools for Stitching Clothing
Before you start stitching, it's important to gather the right tools. Here's a checklist of the basic things you will need to get started:
Needles: Hand-sewing needles for manual stitching or machine needles for sewing machines.
Thread: Choose threads that match or complement your fabric type and color.
Fabric Scissors: Sharp scissors for clean cuts without fraying.
Measuring Tape: Ensure accurate measurements for perfect fits.
Seam Ripper: A handy tool for undoing mistakes.
Pins and Pin Cushion: Secure fabric layers in place while stitching.
Iron and Ironing Board: Press seams and fabric for professional results.
Sewing Machine (Optional): Greatly increases stitching speed, especially for larger projects.
Types of Stitches and When to Use Them
Learning a few basic stitches is enough to handle most clothing repairs and creations:
1. Running Stitch
Use: For temporary seams, repairs, or decorative stitching.
How to Do It: Thread your needle, knot the end, and weave the needle in and out of the fabric in a straight line.
2. Backstitch
Use: For strong, durable seams.
How to Do It: Make a running stitch but bring your needle back one stitch length before going forward.
3. Whipstitch
Use: Finishing edges or sewing on two pieces of fabric together.
How to Do It: Make stitches diagonally over the edges of the fabric, making the loops tight.
4. Hemming Stitch
Use: Hemming pants, skirts, or curtains.
How to Do It: Fold the edge of the fabric and hold it in place with small, diagonal stitches.
5. Zigzag Stitch (Machine Stitch)
Use: To neaten raw edges and prevent fraying.
How to Do It: Use a sewing machine's zigzag setting and guide the fabric smoothly.
Step-by-Step Guide to Stitching Clothing
1. Choose the Right Fabric
Choose fabric that suits your project. For beginners, start with cotton or linen because they are easy to handle, unlike slippery fabrics such as silk.
2. Measure and Cut
Get accurate measurements using a measuring tape.
Mark the fabric using fabric chalk or a washable marker before cutting.
3. Prepare the Fabric
Iron the fabric to remove wrinkles, making it easier to work with.
Pin the fabric pieces together if working with multiple layers.
4. Thread the Needle
Cut a thread length that’s manageable (around 18 inches).
Thread the needle and tie a small knot at the end.
5. Start Stitching
Use the appropriate stitch for your project, ensuring even tension and neat lines.
Keep the stitches close together for durability, especially for seams.
6. Secure the End
Once you’ve completed the stitch, tie off the thread securely to prevent unraveling.
7. Finish with Pressing
Press the garment with an iron to set the seams and give it a polished look.
Tips for Stitching Success
Practice on Scrap Fabric: Before working on your project, practice a few stitches on scrap fabric to perfect the technique.
Use Quality Thread: Bad threads can snap easily, which may cause problems in durability.
Mind Your Posture: Sit comfortably with good lighting to avoid strain and mistakes.
Go Slow: Precision is much more important than speed, especially when learning.
Double-Check Measurements: Measure twice, cut once to avoid costly mistakes.
Common Stitching Projects for Beginners
Here are a few easy projects to help you build confidence:
Hemming Pants: Learn to shorten or adjust the length of trousers with a hemming stitch.
Replacing Buttons: Reattach missing buttons with a few quick stitches.
Fixing Seams: Repair loose or torn seams with a strong backstitch.
Creating Tote Bags: Use basic stitching to sew a simple, reusable fabric tote.
Ready to elevate your wardrobe? Visit our website today and explore our latest collection.
Conclusion: Stitch Your Way to Creative Freedom
Knowing how to stitch together pieces of clothing opens your horizon to endless possibilities. It empowers one to take control, be it repairing, altering, or creating from scratch-a means to express yourself and bring your style into the wardrobe. Start with simple projects, invest in quality tools, and practice your techniques to build confidence.
Stitching with time and patience can go from being just a practical skill to a very creative one that brings all your fashion visions into life.
Frequently Asked Questions
1. Is stitching hard to learn?
Absolutely not! Patience and practice, and one can master basic stitching techniques.
2. Do I need a sewing machine to start?
No, many projects can be done by hand with hand-stitching techniques, though larger projects can be made easier by a sewing machine.
3. What fabric is best for beginners?
Cotton is a great choice because it's sturdy, easy to handle, and widely available.
4. How do I prevent my stitches from unraveling?
Always tie a secure knot at the start and end of your stitching.


Comments
Post a Comment